
The surfaces you walk on every day form the foundational canvas of your home’s interior design. They bear the brunt of daily life—from muddy paws and spilled drinks to heavy furniture and constant foot traffic. Because of this relentless wear and tear, the aesthetic appeal, indoor air quality, and overall property value of your home are deeply tied to the condition of your floors.
However, homeowners frequently find themselves at a crossroads when dealing with aging, stained, or scuffed materials. It is often incredibly difficult to determine whether a dingy surface simply needs a weekend of dedicated deep cleaning, a professional restoration job, or a complete tear-out and replacement. Misdiagnosing the problem can lead to expensive mistakes. Throwing money at specialty cleaning solutions for a surface that is structurally compromised is a frustrating waste of resources, while prematurely ripping out salvageable materials can needlessly inflate your home renovation budget by thousands of dollars.
This comprehensive guide is designed to eliminate the guesswork. By walking you through practical, hands-on diagnostic tests and expert-level evaluation criteria, you will learn exactly how to assess the true condition of your home’s surfaces. Whether you are dealing with faded wood, matted fabrics, or cracked concrete, this breakdown will help you navigate the “repair, clean, or replace” decision with absolute confidence.
Evaluating Scratches, Dents, and Fading on Wood Surfaces
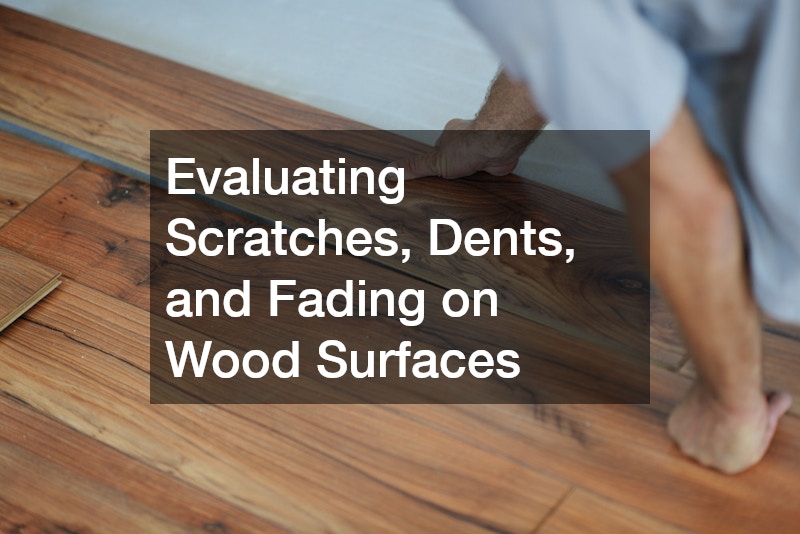
When assessing the state of your solid wood surfaces, the most critical step is differentiating between superficial finish damage and structural damage that penetrates the actual wood grain. Beautifully crafted hardwood floors can easily last for several generations if they are properly maintained and if minor damage is caught early before it can spread or deepen.
To determine the true state of your wood, you need to test the integrity of the protective clear coat (usually polyurethane) that sits on top of the raw timber. Over the years, this protective layer takes a beating from shoes, pet claws, and sliding furniture, leading to thousands of micro-scratches that cause the surface to look dull, cloudy, or faded.
The Water Drop Test:
This is a simple, highly effective method for testing the integrity of your finish.
-
Find a high-traffic area that looks particularly worn or dull.
-
Pour exactly one tablespoon of water onto the surface.
-
Observe how the water reacts over the next few minutes.
-
If the water beads up beautifully and sits perfectly on the surface, your finish is intact, and the dullness is just superficial dirt or very light micro-scratches. A heavy-duty professional cleaning and perhaps a chemical recoat (often called a screen and recoat) will solve the issue.
-
If the water slowly absorbs into the wood over a few minutes, leaving a dark spot, the protective finish has partially worn away.
-
If the water immediately soaks into the wood, your protective seal is completely gone.
When your water test reveals that the protective seal has failed, or if you have widespread, shallow scratches that do not completely gouge the wood, hardwood floor refinishing is the absolute best course of action. This process involves sanding away the old, scratched finish down to the bare wood, smoothing out surface-level imperfections, and applying fresh coats of stain and polyurethane. It is a highly cost-effective way to restore the original luster and extend the lifespan of your investment without buying entirely new materials.
Deciding When to Pull Up Old Boards and Start Fresh
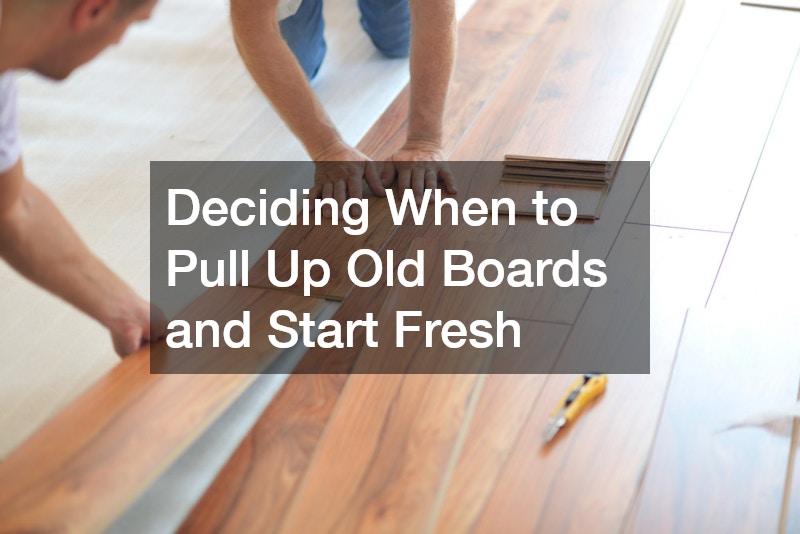
While restoring an existing surface is usually the preferred and most budget-friendly option, wood is not invincible. There are specific structural limitations and severe damage scenarios where sanding and patching simply will not cut it. Recognizing these fatal flaws early will save you from investing in a restoration process that is destined to fail.
One of the most significant limitations of solid wood is that it can only be sanded down a finite number of times. Traditional solid boards feature a tongue-and-groove interlocking system. If previous owners have repeatedly sanded the planks over the decades, the wood above the tongue-and-groove joint becomes dangerously thin. If you sand it down too far, the tops of the nails will become exposed, the boards will become brittle, and the structural integrity of the entire surface will be ruined.
Warning Signs That Demand Replacement:
-
Severe Water Damage: While a small spill caught early is harmless, chronic moisture exposure (such as from a hidden plumbing leak, a consistently overflowing dishwasher, or improper moisture barriers over a concrete subfloor) causes irreversible warping. If the boards are severely cupped (edges are higher than the center) or crowned (center is higher than the edges), they usually cannot be salvaged.
-
Structural Sponginess: As you walk across the room, pay attention to the feel underfoot. If the floor yields, bounces excessively, or feels spongy, the damage has likely bypassed the surface wood and compromised the subfloor beneath it.
-
Deep Gouges and Pet Stains: Urine from pets contains ammonia and uric acid, which can burn through the finish and permanently blacken the wood fibers deep down. Sanding will not remove these black stains.
-
Termite or Pest Damage: Wood-boring insects create hollow channels within the planks, destroying their load-bearing capacity.
In cases of extensive structural rot, severe buckling, or widespread biological contamination, tearing the old materials out to the studs is the only safe option. Paying for a brand new hardwood floor installation ensures that the underlying subfloor can be repaired, proper moisture barriers can be established, and you can start fresh with a structurally sound, beautiful new surface.
Reviving High-Traffic Fabric with Deep Extraction Methods
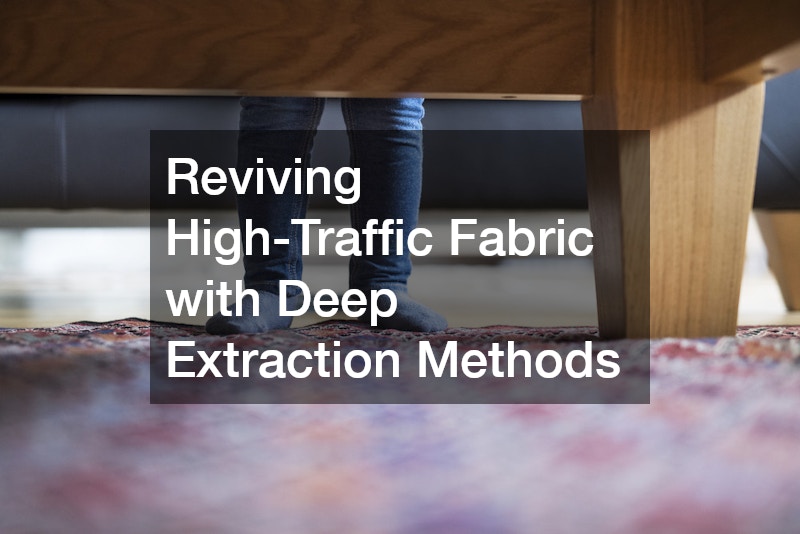
Soft fabric surfaces bring incredible warmth, insulation, and acoustic dampening to a home. However, they act like massive air filters, trapping dust, pet dander, dead skin cells, pollen, and microscopic soil particles deep within their fibers. Over time, as you walk across the room, the friction from your shoes grinds this abrasive dirt against the synthetic or natural yarns. This causes the fibers to fray, untwist, and mat down, creating the distinct, darkened “traffic lanes” you often see in hallways or living rooms.
To prevent this irreversible matting, proactive maintenance is mandatory. Spot cleaning is your first line of defense. When a spill occurs, the golden rule is to blot—never rub. Rubbing agitates the fibers, pushing the staining liquid deeper into the backing while simultaneously untwisting the yarn, creating a fuzzy, permanently distorted texture.
Understanding Your Cleaning Options:
-
Routine Vacuuming: Essential for removing dry soil before it sinks to the base of the fibers. High-traffic zones should be vacuumed every other day using a machine with a motorized beater bar (except on delicate loop piles).
-
DIY Extraction: For seasonal maintenance, mild surface spills, or refreshing a lightly used guest bedroom, renting a standard carpet cleaner from a local hardware store is a perfectly viable solution. These consumer-grade machines spray a mixture of warm water and detergent onto the fibers and use a modest vacuum motor to pull the dirty water back up. However, they lack the heat and suction power needed for extreme restorations.
-
Professional Hot Water Extraction: If your fabrics are heavily matted, deeply stained, or haven’t been thoroughly washed in over a year, you need industrial power. Professional carpet cleaning services utilize high-powered, truck-mounted equipment. These advanced machines heat the water to over 200 degrees Fahrenheit, injecting steam deeply into the pile to break down heavy greases and oils. Most importantly, their massive vacuum blowers extract the water almost completely, pulling up deep-seated allergens and dust mites while ensuring the padding underneath doesn’t remain wet for days.
Recognizing Persistent Odors and Irreversible Pad Damage
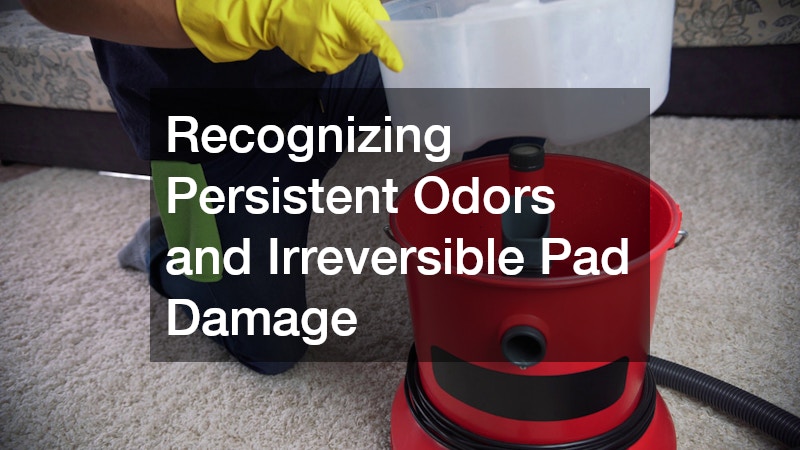
There comes a point in the lifecycle of soft materials where surface-level aesthetics are no longer the primary concern. Even if the visible fibers look reasonably clean after a thorough extraction, hidden biological hazards or structural degradation occurring beneath the surface can render the entire setup unsanitary and unsalvageable.
The padding underneath is just as important as the visible fibers. It provides the luxurious cushioning underfoot, insulates the room, and absorbs the shock of foot traffic, thereby prolonging the life of the surface fibers. However, this padding is essentially a giant sponge.
How to Inspect Hidden Damage:
-
Locate a corner of the room that is out of sight, such as inside a closet or behind a heavy piece of furniture.
-
Using a pair of needle-nose pliers, grab the fibers near the baseboard and gently pull upward to dislodge the material from the tack strip.
-
Fold the fabric back just enough to expose the underlying padding and the subfloor beneath it.
-
Examine the Foam: Is the foam padding crumbling into a fine, dusty powder? When the padding deteriorates to this extent, it can no longer support the fibers, leading to rapid wear and tear on the visible surface.
-
Look for Stains and Mold: Check for dark, crusty stains on the foam or the wooden subfloor. Mold thrives in dark, damp environments. If a previous spill or leak was never fully extracted, mold spores can colonize the padding.
-
The Smell Test: If you constantly notice a distinct, musty odor or the sharp smell of ammonia during humid days, pet urine has likely soaked completely through the primary backing, the secondary backing, and into the foam pad itself.
When liquid penetrates this deeply, the padding acts as a permanent reservoir for bacteria and odors. If an honest, thorough inspection from an experienced carpet cleaning company confirms that mold or severe pet enzyme saturation has compromised the foam pad and the subfloor, no amount of top-down steam extraction will fix the issue. The only sanitary, permanent solution is to pull up the material, seal the subfloor with an odor-blocking primer, and replace everything entirely.
Rejuvenating Concrete Slabs for Durability and Style
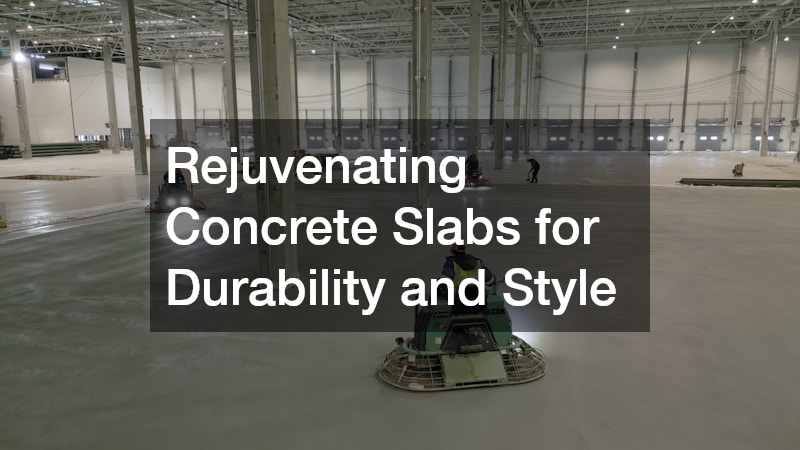
Garages, basements, and enclosed patios frequently feature bare concrete slabs. While concrete is incredibly strong in terms of compression weight, it is actually a highly porous material. Left untreated, a bare concrete slab will easily absorb motor oil, rust from tools, chemical spills, and muddy water, leading to permanent, unsightly stains. Furthermore, unfinished concrete continuously sheds a fine silica dust, making it impossible to keep the space truly clean.
Transforming a dusty, stained concrete slab into a sleek, functional, and highly durable surface is one of the most rewarding home improvement projects you can undertake. However, before applying any paints, sealants, or thick protective layers, you absolutely must verify the moisture levels of the slab. Concrete acts like a dense sponge, wicking moisture up from the earth below. If you trap that moisture beneath an impermeable surface layer, hydrostatic pressure will build up, eventually causing the new surface to bubble, peel, and flake away.
The Plastic Sheeting Moisture Test:
-
Clean a 2-foot by 2-foot square of the concrete slab, ensuring it is free of dust and debris.
-
Cut a square of thick, clear plastic sheeting (like a heavy-duty trash bag or painter’s tarp).
-
Tape the plastic tightly to the concrete using high-quality duct tape, sealing all four edges completely so no air can escape.
-
Leave the plastic undisturbed for a full 24 hours.
-
Inspect the test area. If you see condensation forming on the underside of the plastic, or if the concrete beneath the plastic is noticeably darker than the surrounding area, your slab is transmitting a high level of moisture. This moisture issue must be addressed with a specialized vapor barrier primer before proceeding.
Once moisture is mitigated and minor divots and cracks are filled with a polyurea patching compound, you can apply a heavy-duty protective layer. For spaces like garages or workshops that demand extreme resilience, industrial-grade epoxy coatings are unparalleled. They cure into a thick, non-porous, plastic-like shell that creates a seamless barrier against chemical spills, heavy vehicle traffic, and water damage. Because the application process involves precise chemical mixing ratios, temperature control, and rapid curing times, utilizing a professional epoxy flooring service is highly recommended to guarantee proper surface adhesion and a flawless, bubble-free finish.
Vetting Professionals for Seamless Concrete Finishing
If you have decided that a heavy-duty resinous finish is the right choice for your garage, basement, or commercial space, the next crucial step is finding the right contractor. The concrete finishing industry is saturated with low-cost providers who cut corners, leading to disastrous results. A poorly applied resin coating will succumb to “hot tire pickup”—a phenomenon where the heat and sticky rubber of your car tires melt and rip the coating straight off the concrete.
The single most important factor that determines the success or failure of a resinous coating is surface preparation. The concrete must be porous enough for the chemical to bite into and bond with.
Red Flags and Green Flags in Contractor Selection:
-
Red Flag: Acid Etching. Many low-budget contractors use a process called acid etching to prep the floor. They pour a muriatic acid solution over the slab to eat away the top layer. While this is cheap and fast, it introduces massive amounts of water into the porous concrete—the exact opposite of what you want before applying a moisture-sensitive chemical. It also fails to remove stubborn oil stains or old sealers.
-
Green Flag: Mechanical Profiling. Highly reputable epoxy flooring companies will categorically refuse to use acid etching. Instead, they will insist on mechanical profiling using massive, walk-behind diamond grinders. These machines physically grind away the top millimeter of the concrete, removing all stains, paints, and sealers while simultaneously opening the pores of the concrete to create the perfect rough texture (similar to 60-grit sandpaper) for maximum mechanical adhesion.
-
Red Flag: 1-Day Installations in Humid Climates. Be wary of contractors promising a miracle one-day turnaround without discussing humidity or temperature variables. Proper moisture mitigation primers take time to cure.
-
Green Flag: Comprehensive Warranties and Transparency. A professional outfit will gladly explain their multi-step process, provide proof of insurance, offer a robust multi-year warranty against peeling and delamination, and willingly share a portfolio of locally completed projects for your review.
Swapping Outdated Materials for Modern, Water-Resistant Options
Sometimes, the best choice is neither repairing nor cleaning, but completely rethinking the material itself. This is especially true in high-moisture environments like kitchens, bathrooms, laundry rooms, and basements. Historically, homeowners relied on sheet linoleum, ceramic tile, or early-generation laminate for these areas. However, older laminate is highly susceptible to water damage, swelling and buckling at the seams the moment it gets wet. Sheet linoleum can tear easily and look instantly dated, while tile grout lines require constant, laborious scrubbing to prevent discoloration.
If you are dealing with peeling, water-damaged, or simply unfashionable materials in these utility spaces, a complete replacement is the most logical upgrade path. The ultimate “replace” hack for modern homeowners is pivoting to advanced synthetic options that offer the aesthetics of natural materials without the inherent vulnerabilities.
Preparing for a Modern Upgrade:
Before installing any modern rigid-core materials, subfloor preparation is non-negotiable.
-
Clear out the old material down to the plywood or concrete base.
-
Take a long, perfectly straight metal level or straightedge tool (at least 6 feet long) and lay it across the subfloor in various directions.
-
Look for dips or peaks. Most manufacturers require the subfloor to be flat within 3/16 of an inch over a 10-foot radius.
-
If you lay rigid interlocking boards over an uneven subfloor, the resulting hollow spots will cause the boards to flex under your weight. Eventually, this constant flexing will cause the fragile locking mechanisms to snap, ruining the floor. You must use self-leveling underlayment to fix these dips first.
Once your subfloor is perfectly prepped, luxury vinyl plank flooring is widely considered the ultimate replacement option on the market today. This innovative material has completely disrupted the home improvement industry because it is 100% waterproof, making it impervious to kitchen spills, plumbing leaks, and wet bathroom footprints. Advanced high-definition printing technology allows it to flawlessly mimic the exact grain, texture, and color variations of premium oak, hickory, or natural stone, all while being incredibly resilient to scratches and exceptionally easy to maintain with just a simple damp mop.
Conclusion
Navigating the upkeep of your home’s surfaces doesn’t have to be a guessing game of trial and error. By applying the diagnostic techniques outlined above, you can approach your home maintenance with the analytical eye of an industry professional.
Remember the golden rules of surface management: invest in routine, proactive cleaning to maintain the integrity of your materials; opt for strategic repairs and refinishing when the underlying structure remains strong but the cosmetic surface is flawed; and confidently pull the trigger on a total replacement when materials become unhygienic, structurally compromised, or simply mismatched with the demands of your household environment.
Take a walk through your home today. Look closely at your high-traffic zones, run a quick water drop test, or peek under the corner of an aging rug. Armed with this knowledge, you can now build a practical, proactive plan that protects your budget while maximizing the beauty and comfort of your living space.